

Worldwide Shipping

Cruelty free

Secure Payment

5 Stars on Google
Geode Soap Tutorial
How to Make Geode Soap
Ingredients
- 907 g block of clear melt and pour soap base
- Fragrance oil or essential oil
- White and black cosmetic glitter
- Red mica powder
- Foil
Instructions
Step 1: We recommend starting with a 907 g block of clear melt and pour soap base. If you want to scent your soap, we recommend cutting your soap into chunks, melting it, and then adding the fragrance before you start. You can add fragrance oil or essential oil. Once you’re ready to begin you would then start with a solid scented soap block.
Step 2: Begin with 113 g of clear melt and pour soap base. Cut into small chunks. And then sprinkle about four pinches of skin-safe glitter onto your soap chunks.
Step 3: Roll up a small piece of foil into a ball and set it inside the center of the soap shards.
Step 4: Now weigh out 57 g of clear melt and pour soap base. Heat for 15-30 seconds in the microwave, just until melted. Once it’s cool enough to handle, drizzle a small amount onto your soap chunks. Begin working the soap chunks into a ball around the foil ball.
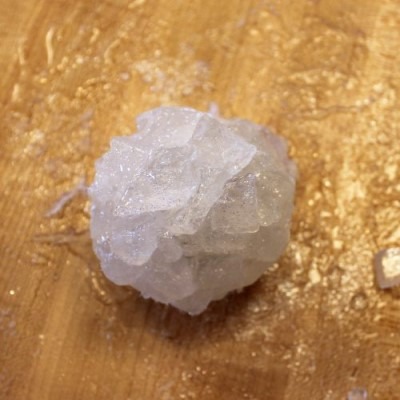
Step 5: Be patient. The chunks won’t want to stick together at first. Keep working the pieces together and pouring the melted soap onto the chunks. As the melted soap cools the soap chunks will start holding together. Once you’ve formed a solid ball that stays together, you’re ready for the next step.
Step 6: Weigh out 57 g more of your clear melt and pour soap base and cut into chunks as you did when you first started. Then weigh out 57 g of clear melt and pour soap base and melt in the microwave. Add a colored mica powder of your choice to desired color and mix to combine.
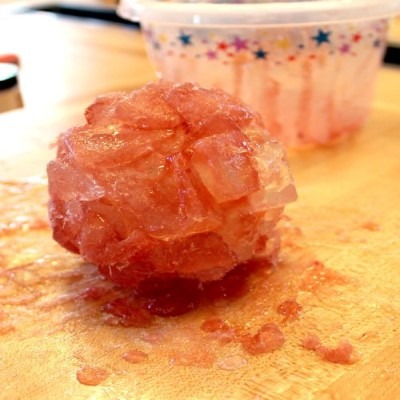
Step 7: Use the colored melted soap to adhere the new soap chunks around the ball of soap you formed previously.
Step 8: Now dust the top of the soap ball with your sparkly white glitter.
Step 9: On top of this add a complimentary colored mica powder to the one you used previously to tint your soap.
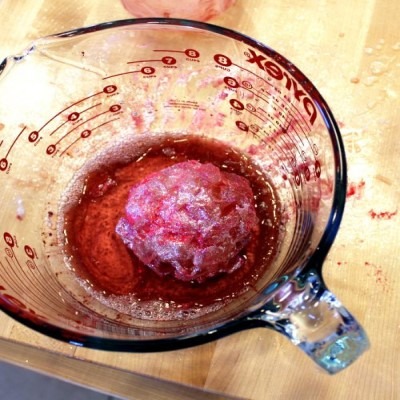
Step 10: Weigh out 57 g of clear melt and pour soap base into a large container. We used an 8 Cup Pyrex measuring cup but you could also use a large glass bowl. Cut into chunks and melt. Add a soap colorant or mica powder of your choice until the desired color is achieved. Stir until the color is well mixed.
Step 11: Now dip the geode soap ball into the colored soap until it’s coated with about half of the soap – or an ounce of the melted soap – in your container.
Step 12: Set the soap ball aside on a wire cooling rack to solidify it further. Then, sprinkle your soap ball with black skin-grade glitter.
Step 13: Dip your soap ball back into the remaining melted soap. Coat the soap ball with more soap. Allow your soap geode to solidify again by placing it back on the wire cooling rack.
Step 14: Mix black skin-safe glitter to suit the remaining melted soap. Sprinkle more black glitter onto the soap ball.
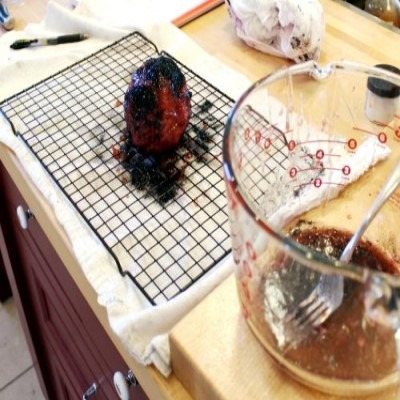
Step 15: Now cover the soap geode with the remaining soap in the bowl.
Step 16: Keep spooning the melted soap over the soap geode you are forming until you’ve used all of the soap left in your bowl. As the soap cools it will become gummy. As it does this, you can slowly start to smooth the outside of the ball with your hands.
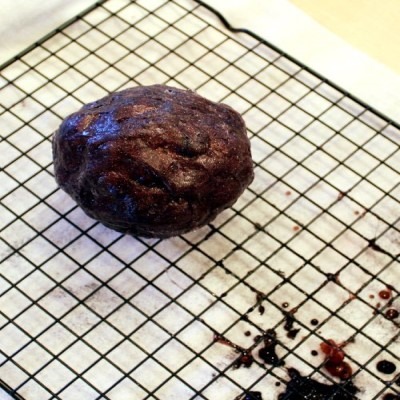
Step 17: Place your crystal geode soap egg onto your wire cooling rack to finish hardening. You can smooth out any rough edges while the soap is in this stage.
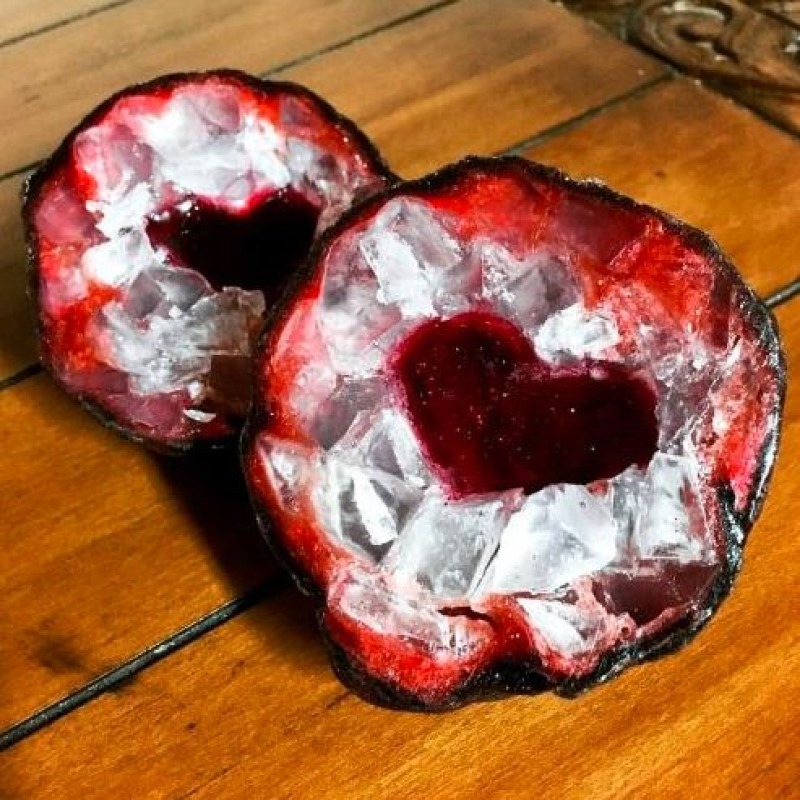
Step 18: Once the soap has cooled and hardened, use a hot knife – you can just put it under hot water – to carefully cut your soap geode in half. Work around the foil in the center using the knife to cut around the diameter of your soap geode. Remove the foil from the center of your soap geode. Enjoy!
NOTE: To create a heart in the center of your soap geode you can do several things. You can either use a knife to cut out a heart shape in the center of each side of your soap geode and fill it with red-colored clear melt and pour soap; you can place a heart embedded from a small heart-shaped mold into the center of your soap geodes and pour clear melt and pour soap around them; or you use a small heart cookie or knife to create a heart embed for the center of your soap geodes from a thin layer of red dyed soap.


Reviews
There are no reviews yet.