
Standing over a couple of bottles of oil and a jar of sodium hydroxide, wondering if you’re about to make soap or a giant mess? That hesitation is completely normal. Almost everyone feels a spike of nerves before tackling their very first batch of cold process soap. Fortunately, successful soap making boils down to three straightforward rules: weigh everything precisely to the gram, calculate the correct amount of lye for your specific oils, and follow proper safety precautions. The rest comes down to gentle stick blending, pouring, and a little patience.
Below, you’ll find an approachable, palm-free beginner recipe formulated for 500 grams of oil, complete with lye calculations and step-by-step instructions. We’ll cover safe lye handling, explain what actually happens inside the mold, and show you how to troubleshoot if your batter acts up.
The Recipe at a Glance:
- Base oils: 300 g olive oil, 125 g coconut oil, 50 g shea butter, and 25 g castor oil
- Lye solution: approx. 70 g sodium hydroxide dissolved in 140 g distilled water
- Superfat: ~5%
- Target mixing temperature: 32–43 °C (90–110 °F) for both lye and oils
- Time in the mold: 24 to 48 hours
- Curing time: 4 to 6 weeks
What You’ll Need
At its heart, cold process soap making relies on a chemical reaction called saponification: fatty acids in oils react with an alkali (sodium hydroxide dissolved in water) to create soap and glycerin. Unlike melt-and-pour bases—where this chemical conversion has already been done for you—cold process lets you formulate from scratch. That means total control over your bar’s lather, hardness, and skin feel. If you’re curious about the underlying chemistry, check out our guide to the science behind cold process soap.
Here is your essential toolkit:
- A digital kitchen scale accurate to 1 gram. Measuring oils and lye by volume never works because different oils have different densities.
- An immersion blender (stick blender). Whisking by hand can take hours; a stick blender brings your batter to trace in just a few minutes.
- A heat-safe lye pitcher. Use stainless steel or heavy-duty polypropylene (recycling symbol #5 / PP). Never use aluminum or fragile glass.
- A large mixing bowl and silicone spatula.
- A digital infrared or probe thermometer.
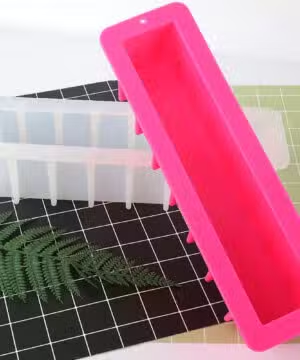
- A soap mold. A silicone loaf mold is the easiest choice for beginners because it releases the soap cleanly. We recommend our 30 cm skinny silicone soap mold.
Working Safely with Lye
Sodium hydroxide (caustic soda) demands respect. According to the International Chemical Safety Cards (ICSC), skin contact can lead to deep, painful chemical burns. While that sounds alarming, handling lye is entirely safe once you build the right habits.
- Suit up first. Put on wrap-around safety goggles (prescription glasses do not provide sufficient side protection), nitrile or rubber gloves, and long sleeves before opening your lye container.
- Always pour lye into water—never water into lye. Adding liquid to dry lye can cause a sudden, violent eruption of caustic liquid. A simple way to remember: the snow falls on the lake (lye into water).
- Work in a well-ventilated space. Dissolving lye in water generates caustic steam and fumes. Mix near an open window or beneath a running range hood, and never lean over the pitcher.
- Keep aluminum, tin, and zinc away from your workspace. The UK Health Security Agency (UKHSA) warns that sodium hydroxide reacts aggressively with these metals, releasing highly flammable hydrogen gas. Stick to stainless steel, silicone, and lye-safe plastics.
- Clear the room of children and pets, and never leave an active lye solution unattended.
If lye splashes onto your skin, take off any contaminated clothing immediately and rinse the area under cool, running water for at least 15 minutes. For significant contact, keep rinsing and seek immediate medical care. Do not pour vinegar on the burn. As the US Agency for Toxic Substances and Disease Registry (ATSDR) notes, neutralizing an alkaline burn with an acid produces an exothermic (heat-releasing) reaction, which can add a thermal burn on top of the chemical one. If lye gets into your eyes, flush them continuously with water and call emergency services (911/112) without delay.
The Recipe: 500 g Oils, 5% Superfat
This beginner-friendly, palm-free formula strikes a classic balance: olive oil lends gentle conditioning, coconut oil produces cleansing power and big bubbles, shea butter brings a rich, creamy lather, and castor oil stabilizes the foam.
| Oil | Percentage | Weight | Properties in Soap | NaOH SAP Value (per g of oil) |
|---|---|---|---|---|
| Olive oil | 60% | 300 g | Mild, moisturizing, softer bar | approx. 0.135 |
| Coconut oil | 25% | 125 g | Hardness, fluffy lather | 0.183–0.191 |
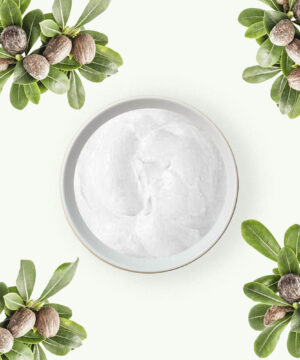
| Shea butter | 10% | 50 g | Creamy, skin-conditioning lather | 0.128–0.130 |
| Castor oil | 5% | 25 g | Rich, stable lather | approx. 0.128 |
You can find both cold-pressed organic castor oil and high-grade shea butter in our shop.
-
€4.92 €1,446.24Price range: €5.95€4.92 through €1,749.95€1,446.24 incl. VAT inc. VATExcl. VATSelect options This product has multiple variants. The options may be chosen on the product page
-
€7.49 €269.95Price range: €7.49€7.49 through €269.95€269.95 incl. VAT inc. VATExcl. VATSelect options This product has multiple variants. The options may be chosen on the product page



How We Arrive at 70 Grams of Lye
Each oil requires a specific amount of sodium hydroxide to saponify completely—known as its saponification value (SAP value). To calculate the lye required, multiply the weight of each oil by its SAP value and add the results together:
- Olive oil: 300 g × 0.135 = 40.5 g
- Coconut oil: 125 g × 0.183 = 22.9 g
- Shea butter: 50 g × 0.128 = 6.4 g
- Castor oil: 25 g × 0.128 = 3.2 g
Total: ~73 grams of sodium hydroxide.
Using 73 grams would convert 100% of the fats into soap, leaving zero free oil behind. To ensure the finished bar is mild and moisturizing, soap makers build in a “superfat” (or lye discount). A 5% superfat is the gold standard recommended by veteran formulators like Soap Queen. Factoring in a 5% discount gives: 73 g × 0.95 ≈ 69.3 to 70 g.
SAP charts can vary slightly: using a higher SAP value for coconut oil (0.191) yields around 70.5 g, whereas conservative values land near 69.3 g. Rounding to 70 g leaves your superfat safely within the ideal 4% to 6% window.
For our liquid amount, we use a 33% lye concentration (roughly a 2:1 ratio of water to lye). That means dissolving our 70 g of lye into 140 g of distilled water. This concentration offers a forgiving balance for beginners: a looser liquid ratio (25–28%) gives extra time for complex swirl designs, while a tighter ratio (37–40%) sets up much faster.
Remember: If you substitute any oil in this recipe, you must recalculate your lye. Swapping 50 g of shea butter for sunflower oil changes the chemical demand completely. Always run tweaks through a lye calculator; you can read more in our tutorial on calculating your lye solution. Too much lye produces an alkaline, caustic bar that irritates the skin—a mistake you often won’t notice until the batch has cured.
Step-by-Step Instructions
Set aside an uninterrupted block of time, and weigh out all ingredients before starting. A tidy, well-organized workspace makes the whole experience relaxed and rewarding.
- Gear up and weigh your water. Put on your goggles, gloves, and long sleeves. Weigh 140 g of distilled water into your heat-resistant pitcher.
- Mix the lye. In a separate small container, weigh 70 g of sodium hydroxide. Slowly add the dry lye to the water, stirring gently with a spatula until the crystals dissolve and the liquid turns clear. It will heat up rapidly. Many soapers recommend preparing the lye solution 1 to 2 hours ahead of time so it can cool down naturally.
- Melt and combine your oils. Weigh the coconut oil and shea butter, then melt them gently over low heat or in short microwave bursts. Pour in the olive and castor oils. Stir until the mixture is clear and fully liquid. If it looks cloudy, hard fats are cooling too quickly, which can cause a false trace later on.
- Match your temperatures. Check both your lye water and your melted oils. Both should sit between 32 and 43 °C (90–110 °F), ideally within a few degrees of each other.
- Combine. Slowly pour the lye solution into the oils. Submerge your stick blender at an angle and tap the head gently against the bottom of the bowl to burp out trapped air bubbles.
- Blend to trace. Pulse the blender in short 5- to 10-second bursts, alternating with brief manual stirs using the motor turned off. Stop as soon as you reach “light trace”—when all oil streaks are gone and the batter resembles a thin pouring custard. Drizzle a drop across the surface; it should leave a faint trail for a second before sinking back in.
- Add fragrance. If you’re scenting your soap, gently stir your fragrance oil in by hand now. Have your mold ready to go, as some scents can accelerate trace quickly.
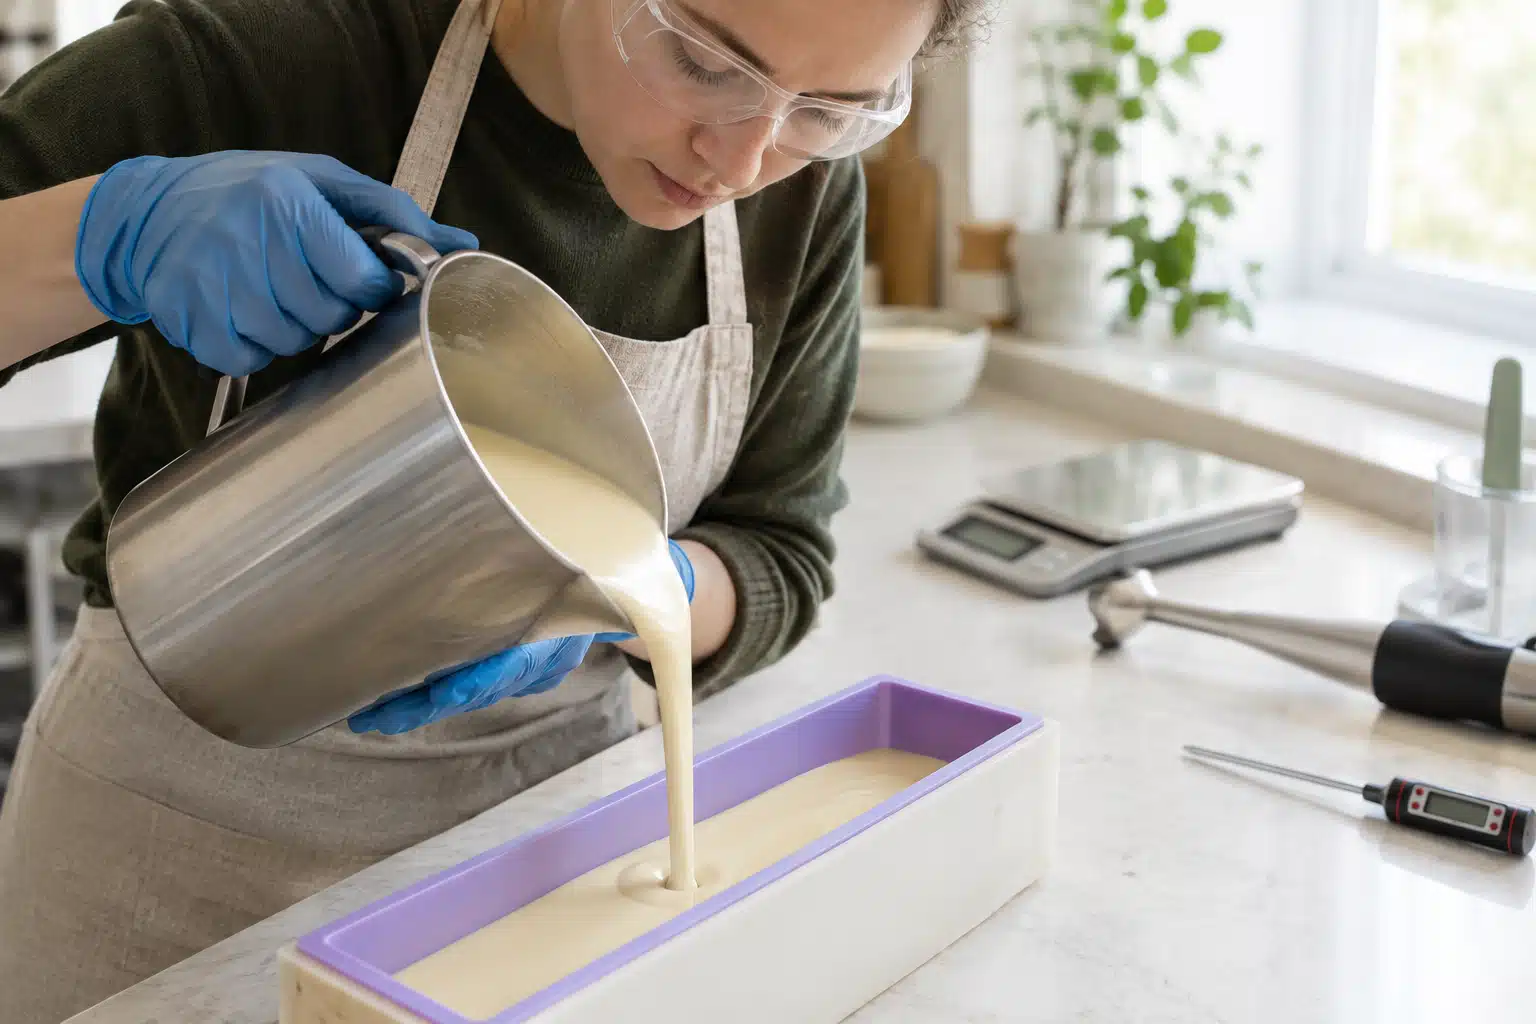
- Pour into the mold. Pour the batter into your silicone mold, then rap the mold firmly against the counter a few times to release any trapped air pockets.
- Insulate and wait. Cover your mold and leave it in a warm, undisturbed spot for 24 to 48 hours. The soap is still mildly caustic during this initial stage, so keep your gloves on when handling or unmolding it.
Looking for scents? Explore our curated range of fragrance oils for cold process soap. When working with a new scent, test it first in a tiny test batch—certain fragrance compounds can cause the batter to accelerate or seize without warning.
Gel Phase and Curing
As saponification gets underway in the mold, the batter generates its own internal heat, often climbing as high as 82 °C (180 °F). When this happens, the soap passes through the “gel phase,” taking on a semi-translucent, jelly-like look from the inside out.
Going through gel phase does not impact the cleansing quality or longevity of the soap; it purely affects aesthetics. Soap that gels generally exhibits deeper, more vivid colors and a slight luster, while un-gelled soap keeps a soft, creamy, matte look. You can steer this outcome intentionally: wrap your mold in a towel to encourage gelling, or tuck it into the fridge right after pouring to prevent it. Dive into the details in our article on what the gel phase is in soap making.
Once your soap has firmed up (usually after 24 to 48 hours), slice it into bars. This 500 g oil batch will yield about six to eight good-sized bars. Arrange them on a coated drying rack or parchment paper in a cool, dry area with plenty of air circulation.
While the bars are chemically mild enough to use after a few days, a full 4 to 6-week cure is vital. During curing, excess water evaporates, producing a significantly harder, milder bar that lathers better and lasts much longer in the shower. To preserve your soap long-term, read our guide on storing soap and shelf life.
Troubleshooting Common Issues
- False Trace: The batter thickens abruptly before the lye and oils have truly emulsified. This happens when cooler lye solidifies the melted butters or coconut oil. Keep your blending temperatures within the recommended range and continue stick blending until a stable emulsion forms.
- Seizing or Sudden Acceleration: The batter transforms into a thick, mashed-potato consistency within seconds, usually triggered by a difficult fragrance oil or floral essential oil. Work quickly: glop the batter into the mold, pack it down firmly, and smooth the top. It might look rustic, but it will still saponify into usable soap.
- Soda Ash: A powdery white film that occasionally forms across the top of the curing soap when unreacted lye meets carbon dioxide in the air. It is completely harmless and washes off with the first use. To minimize it, spritz the freshly poured batter with 91%+ isopropyl alcohol or seal the mold with plastic wrap.
- Lye-Heavy Soap: If your soap looks crumbly, feels chalky, or weeps oily puddles of liquid after a few days, it may contain unreacted lye. Always handle questionable soap with gloves. Skip the old-fashioned “zap test” (touching your tongue to raw soap)—putting unreacted alkali in your mouth is unnecessary and unsafe. Standard paper litmus strips won’t help much either: cold process soap naturally sits at a pH of 9 to 10, and a slightly lye-heavy bar looks identical on test paper. Furthermore, formulating a “pH neutral” (pH 7) bar is impossible—at a neutral pH, true soap molecules break down. Find out why in our deep dive on pH-neutral soap.
Selling Soap? Important EU Regulations
Crafting for yourself and gifting to friends and family requires no special paperwork. However, if you plan to sell your soap within the European Union or the UK, body soaps are formally classified as cosmetics under EU Cosmetics Regulation (EC) No 1223/2009.
Before selling a single bar, you must have your formulation reviewed and certified by a qualified safety assessor (resulting in a Cosmetic Product Safety Report, or CPSR) and register the product on the Cosmetic Products Notification Portal (CPNP). There is no small-batch or hobbyist exemption, so make sure your legal foundation is solid before turning your craft into a business. We provide safety assessments if you decide to take that step.
Ready for Your Next Batch?
Once you have this foundational recipe under your belt, you can unleash your creativity. Try tinting your batter using mica powder in soap, experiment with custom fragrance blends, or test out our updated 21st-century olive oil soap recipe. Explore our full soap making category to stock up on lye, specialty oils, and molds for your next project. And if you’d like to compare cold process with other techniques first, visit our comprehensive beginner’s guide to soap making.


