
Have you ever wondered why store-bought candles often burn down too fast or barely throw any scent when lit? Making your own candles is surprisingly easy and gives you complete control over your ingredients. You choose the wax, the fragrance, and the container. In this step-by-step guide, you’ll learn how to craft beautiful candles right at home. From essential supplies and pouring techniques to key safety tips, here is everything you need to get started.
What Do You Need to Make Candles at Home?
When you’re starting out, you don’t need fancy equipment—a few basic tools will take you a long way. Precision is key, however, as exact temperatures and accurate measurements directly determine how your candle looks and burns.
Here are the essential supplies for your workbench:
- Candle wax: The foundation of your candle. Popular options for candle wax include soy wax, paraffin wax, and beeswax.
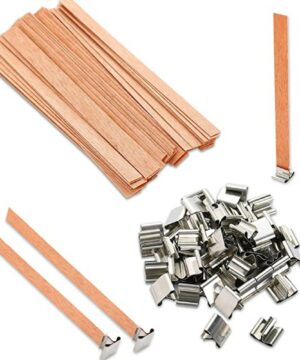
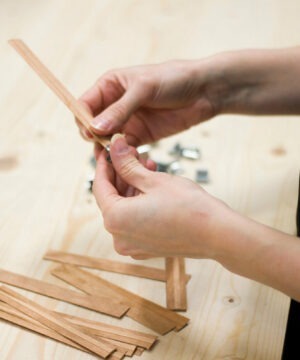
- Candle wick: You can’t have a flame without a wick. Choose classic cotton wicks or go for wooden wicks to get that cozy crackling sound.
- A container or mold: Glass jars and metal tins work great for container candles, while silicone molds are ideal for freestanding, shaped candles.
- Thermometer: Essential for tracking precise temperatures during melting and fragrance blending.
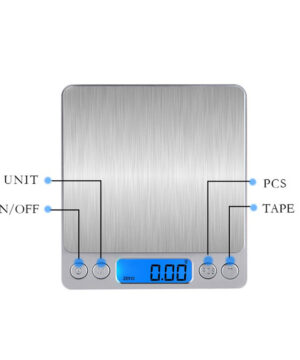
- Digital scale: Measuring ingredients accurately by weight (in grams) guarantees consistent results every time.
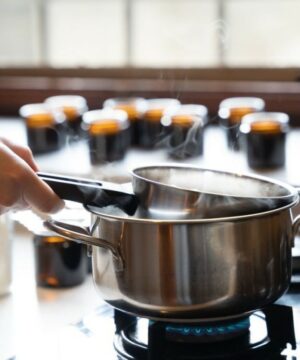
- Double boiler: Crucial for melting wax gently over indirect heat without scorching it.
- Wick centering tool and glue dot: Secures the wick tightly to the bottom of your container and keeps it centered at the top.
If you’d rather not buy each item separately, a complete candle making kit provides all the supplies you need for your very first project.




Choosing the Right Candle Wax and Wick
The secret to a great candle lies in pairing the right wax with the proper wick. As explained in our beginner’s guide to candle wax, every wax type has distinct properties. Soy wax is plant-based, renewable, and slow-burning. Paraffin wax delivers a strong scent throw and cures with a smooth finish. Compare your options in our detailed guide on soy wax vs paraffin wax to see which best fits your project.
Wick selection is just as critical. A wick that is too small causes tunneling—where only a narrow channel melts down the center—while an oversized wick produces an excessively tall flame, soot, and smoke. Want to figure out which wick fits your vessel best? Check out our guide on choosing the right wick. You can also browse our full range of candle wicks across various styles and sizes.
-
 €2.44 €144.59Price range: €2.95€2.44 through €174.95€144.59 incl. VAT inc. VATExcl. VATSelect options This product has multiple variants. The options may be chosen on the product page
 -
€5.74 €123.93Price range: €6.95€5.74 through €149.95€123.93 incl. VAT inc. VATExcl. VATSelect options This product has multiple variants. The options may be chosen on the product page
-
€3.26 €300.00Price range: €3.95€3.26 through €363.00€300.00 incl. VAT inc. VATExcl. VATSelect options This product has multiple variants. The options may be chosen on the product page


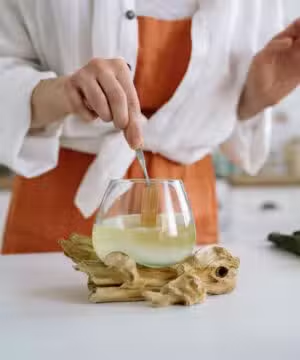


Step-by-Step: Pouring Your Own Container Candle
Crafting a container candle in a glass jar is the perfect starting project. Follow these steps for a clean, professional result:

- Prepare the jar and wick: Thoroughly clean and dry your glass jar. Secure the metal tab at the base of the wick to the inside center of the jar using a glue dot. Place a wick centering tool across the top of the jar to keep the wick taut and upright.


- Weigh the wax: Measure your wax on a digital scale. A helpful rule of thumb: always weigh wax in grams rather than volume in milliliters.
- Melt in a double boiler: Place the wax in a double boiler set over shallow water. Heat gently while monitoring the temperature with a thermometer. Soy and paraffin wax typically melt between 70 and 80°C (158 to 176°F). Never place wax directly over an open flame or direct heat source.
- Add fragrance oil and dye: Mix in your candle fragrance oil once the wax has cooled slightly (usually around 65 to 70°C / 149 to 158°F). A fragrance load of 6% to 8% is ideal for beginners. Read our guide on making candles with fragrance oils for detailed ratios. For color, add candle dye and stir gently for two minutes. Learn more in our article on coloring candles.
-
 €1.24 €156.98Price range: €1.50€1.24 through €189.95€156.98 incl. VAT inc. VATExcl. VATSelect options This product has multiple variants. The options may be chosen on the product page
- Pour into the container: Allow the wax to cool to its pouring temperature (for soy wax, usually between 55 and 65°C / 131 to 149°F). Pour slowly to minimize air bubbles, leaving about 1 centimeter (half an inch) of space at the top.
- Cure and trim the wick: Place the jar on a level, draft-free surface at room temperature and let it set undisturbed for at least 24 hours. Patience pays off: soy candles often require 1 to 2 weeks of curing time to achieve their peak scent throw. Trim the wick to about 5 mm (1/4 inch) above the wax surface before lighting. For more tips, visit our master guide on how to make a candle.
Pouring Molded Candles
Freestanding candles—like trendy bubble or pillar candles—require a slightly different technique and specialized candle molds.
When working with molds, use a harder wax known as a pillar blend. Its rigid structure allows the candle to release effortlessly once fully set. Pierce a small hole in the bottom of a silicone mold with a needle, thread the wick through, and seal the opening if necessary to prevent leaks. Check out our step-by-step tutorial on pouring candles in a mold for full instructions.


Safety Tips for Making and Burning Candles
Working with hot wax requires mindful preparation. Keep these essential safety practices in mind whenever crafting or burning candles:
- Never leave melting wax unattended: Keep a constant eye on hot wax while it is on your heat source.
- Use heat-resistant glass: Everyday drinking glasses can shatter from thermal shock. Stick to containers rated specifically for candle making. Our guide on using glass candle jars safely explains what to look out for.
- Ventilate your workspace: Work in a well-ventilated area, especially when adding concentrated fragrance oils.
- Test every creation: Always perform a burn test before gifting or producing a new batch. Place the candle on a stable, heat-safe surface at least 30 cm (12 inches) away from flammable materials. Follow the protocol outlined in our guide to candle burn testing.
- Extinguish in time: Stop burning your candle when roughly 1 centimeter (half an inch) of wax remains at the bottom to keep the container from overheating.
Be sure to also read our guide on 5 things every beginner candle maker should know to set yourself up for success.
Making your own candles is a rewarding, creative hobby that fills your home with warmth and custom scents. With a little precision regarding temperatures, measurements, and quality ingredients, you’ll produce beautiful results every time. Ready to build your setup? Explore our full candle making collection and stock up on supplies at YouWish today!


