Many people would like to make natural soap at home, but are not sure how to get started. Because the cold-pressed method gives you complete control over ingredients, colors and fragrances, this method is the most widely used. With simple instructions and basic tools, you can make solid, durable soap blocks that are gentle on the skin. The basics of soap making, safety precautions and three easy cold-pressed soap recipes for beginners are all covered in this guide. By the end, you’ll know how to safely mix oils, pour your batter, use lye and dry your soap blocks.
Why choose cold-pressed soap?
The cold process method is still one of the most reliable and traditional ways to make soap, and for good reason. Unlike melt and pour techniques or hot process methods, cold process methods do not require external heat. This means that delicate ingredients such as clays, natural butters and essential oils are preserved without compromising their qualities. As a result, your soaps retain the natural benefits of the ingredients while cleansing at the same time.
The creative freedom offered by the cold process is another attractive benefit. Natural soap can be made in a variety of ways, such as with intricate color swirls, layered designs or simple, creamy pieces of soap. The possibilities increase with textured tops, drop swirls and marbling once you become adept at mastering the trail. Because of its adaptability, the cold process is perfect for both beginners who want to learn the craft and experienced makers who enjoy trying new methods.
Another important point is transparency. When you make your own pieces of soap, you can control exactly which oils, butters and fragrances you use. You tailor each recipe to your skin type or preferences and avoid unnecessary cleansers and fillers. With good cold process soap recipes, you’ll make pieces of soap that last longer than store-bought soap, lather richly and harden after curing. For beginners, making something can be as satisfying as the result. It feels like both art and science to watch oils and lye turn into a solid, usable soap. With a little practice, each batch gets better and cured soaps often get better over time. The reason so many people decide to start making soap using the cold process is that it combines creativity, control and natural care.
Safety first
Learn more about the safety of lye before trying recipes for cold-pressed soap. Lye, also called sodium hydroxide, is a powerful alkali that forms soap when it reacts with oils. In raw form, it can burn skin, but when finished, it is safe.
Always wear gloves, long sleeves, safety glasses and make sure the work area is well ventilated. Keep children and pets out of the room during mixing. Remember the golden rule: never add water to lye, but always add lye to water. Lye can bubble immediately when water is added.
Rinse with cold running water for at least 15 minutes if lye gets on your skin. Applying vinegar to burns can make the damage worse. Making soap is easy and stress-free if clear safety procedures are in place.
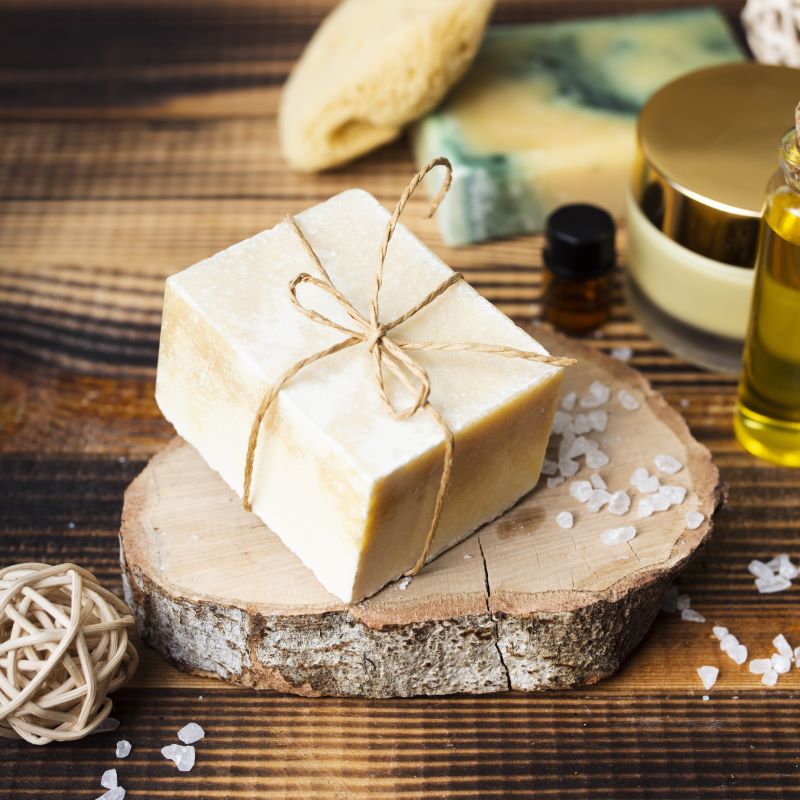
Supplies
The good news is that you don’t need expensive equipment to make natural soap. Most supplies are everyday kitchen items, but after you use them with lye, they should only be used for soap. Because precision is crucial in all cold-pressed soap recipes, a digital scale is necessary. You will also need a thermometer, silicone spatulas, a hand blender and heat-resistant containers.
Since it can be reused and the soap comes out cleanly, a silicone mold is the best option. Use baking paper to line the mold if it is made of wood. Set up a shelf or rack with adequate ventilation so your soap blocks can dry. With this small set of tools, you can make a lot of soap at home.
How the cold process works
Saponification is at the heart of recipes for cold-pressed soap. Fatty acids in oils are broken down by lye to produce glycerin and soap. The type of oils you choose will determine how much lye you need. You can calculate the amount of sodium hydroxide you need for your recipe with a lye calculator.
Most beginners use a super fat content of about 5%. This makes the soap gentler on the skin because 5% of the oils remain unsaponifiable. To balance working time and drying speed, a lye concentration of about 33% is usually used. If you understand these figures, you can make natural soap that is safe, mild and long-lasting.
Choosing the right oils
Different oils give your soap different properties. Olive oil provides a creamy, conditioning lather, while coconut oil provides bubbles and firmness. Castor oil improves lather, and butters such as shea butter or cocoa butter make soap firmer and creamier.
A balanced recipe often combines several oils. For example, a mix of olive oil, coconut oil and castor oil makes a reliable soap for everyday use. When making natural soap, you can experiment with percentages until you find the texture and lather you like. Over time, you’ll build your own library of favorite cold-pressed soap recipes.
Smell and color
Adding color and fragrance is one of the fun things about soap making. Both essential oils and fragrance oils are effective, but always use them according to the recommended dosages. Based on the weight of the oil, most makers of cold-pressed soap start with 3-5% fragrance oil. Try small amounts first before making a large bar of soap, as some fragrances speed up tracing.
Natural powders, micas, oxides and clays can all add color. To avoid lumps, mix the powders in a small amount of oil before adding them to the batter. Beginners often use simple designs, such as a single color or a soft swirl. With some practice, you can create multilayered works of art with your cold-pressed soap recipes.
Step-by-step guide
Soap making has a consistent rhythm. Start by carefully weighing out your oils and lye. Slowly add lye to distilled water to make your lye water and then let it cool. Melt your hard oils and mix them with your liquid oils at the same time.
Mix the oils and lye water when they are both between 30 and 40 °C. Mix in short bursts with a hand blender until the mixture thickens to a light trace. You can now add your color and fragrance. Pour the batter into a mold, tap out any air bubbles and cover the mold to insulate.
Remove the bread from the mold and cut into pieces after 24 to 48 hours. Let them dry on a rack for four to six weeks. During drying, the water evaporates, making the soap milder and harder. During this drying period, cold-pressed soap recipes are converted from raw batter into finished, high-quality pieces of soap.
Cold soap recipes for beginners
Now let’s look at three examples of cold soap recipes. Each recipe uses readily available oils and is intended for beginners. The lye concentration is set at 33% and the superfat content at 5%. To be safe, always use a lye calculator to calculate the exact amount of oil you need.
Recipe 1: Creamy soap for everyday use
This recipe has a balanced ratio of olive oil for mildness, coconut oil for bubbles and castor oil for lather. The soap is firm and suitable for daily use. A gentle lavender scent makes it a perfect start to your soap-making adventure.
Recipe 2: Comfort soap with olive oil and shea butter
For dry or sensitive skin, this recipe contains more olive oil and has added shea butter. The result is a soft, nourishing soap with smaller bubbles. It shows how to make natural soap that feels different by changing the oil mix.
Recipe 3: Luxury soap with cocoa butter
Cocoa butter gives this recipe a glossy, hard finish. Combined with coconut and olive oil, it creates a rich, long-lasting soap. This is ideal as a gift or for anyone looking to expand their cold-pressed soap recipes.
Tips for trace and casting
Mastering trace is one of the most important skills in soap making. Trace is the point at which the lye water and oils have emulsified and the batter begins to thicken. A light trace has the consistency of thin custard, while an average trace is more like pudding. A thick trace makes it harder to pour smoothly, but is useful for sculpted tops and layered designs.
Temperature plays a big role. If your oils and lye are too hot, the batter thickens quickly. Cooler oils, around 30-35 °C, slow the trace and give you more time to work. The water content also matters: a higher water content keeps the mixture liquid, while a stronger lye solution thickens faster. The type of oils you use also affects speed. Recipes with lots of olive oil go slow, while recipes with coconut oil or butter reach trace quickly.
When making natural soap, it is helpful to mix in short bursts and stir by hand in between. This prevents overmixing and gives you control. If you want swirls or multicolored designs, stop at the light trace to allow the batter to flow. For a rustic, textured finish, mix longer to a medium or heavy trace. Over time, you’ll develop an instinct for each recipe and know how to adapt your technique to your creative plan.
Common problems and solutions
Even the best recipes for cold-pressed soap do not always work out perfectly, especially for beginners. A common problem is overheating, causing a crack at the top of the block. This often happens when the mold is too heavily insulated or when certain fragrance oils increase the temperature. You can prevent this by checking the mold regularly during the first few hours and placing it in the refrigerator if you see signs of overheating.
Another common problem is soda ash, which looks like a white, powdery layer on the surface. It does not affect the quality of the soap, but many people find it unsightly. By spraying the surface with isopropyl alcohol immediately after pouring, you can reduce ash buildup. If it still appears, you can steam or scrape it away after curing.
Soft soap is another concern. Don’t panic if your soap is still sticky after a week. Recipes with lots of olive oil and batches with lots of water often need more time. Extending the curing time usually solves the problem and after six to eight weeks the soap is much harder. A failed batch is rare and most problems can be solved with patience.
It is also possible that the scent may fade. Some essential oils, especially citrus oils, lose their potency over time. Choosing stable oils or mixing them with base notes such as patchouli, cedarwood or benzoin will keep the scent longer. If your design or scent didn’t turn out as you planned, consider that a learning experience. Each batch of soap you make teaches you how different oils, temperatures and additives behave. With a little practice, these early mistakes become valuable experiences.
Testing and storage
Make sure your soap is completely saponified before using it. The pH of a safe soap ranges from 8 to 10. You can do a quick “zap test” by holding the soap against your tongue or using pH strips.
Store cured pieces of soap in a dry, cool place with air circulation. They will stay fresh if you wrap them in breathable paper. Homemade soap can last up to a year without losing quality, provided you store it properly. This care is part of the craft when you make natural soap.
Frequently Asked Questions
V1. Do I always need a lye calculator?
Yes. To ensure the safety of your cold-pressed soap recipes, even minor changes in the oil must be recalculated.
V2. Can I use any mold?
The best molds are silicone molds because they are reusable and release easily. Wooden molds require a liner.
V3. How long does soap need to mature?
Most pieces require four to six weeks. Harder, more durable pieces are produced by longer aging times.
V4. What happens if my soap does not have a strong smell?
Use a scale to measure fragrance oils and check that they are within safe IFRA standards. Use stable oils when making soap because some fragrances fade.
Conclusion
Learning to make natural soap using the cold process method is both creative and practical. By starting with safe habits, basic tools and simple recipes for cold process soap, you’ll build skills that grow with each batch. Over time, you can discover new oils, colors and designs and turn your hobby into a personal care craft.
With the right supplies, your soap making becomes easier and more fun, from initial pouring to final curing.